VSCode as Arduino IDE
One of the projects I’m working on will use an ESP8266 module. An easy way to program these if you don’t want to use the Node MCU firmware, is to use the Arduio IDE with the supported ESP8266 community libraries. The Arduino IDE is nice, and it gets the job done, but I want something more. This post is about getting VSCode to build, compile, and upload arduino sketches for the ESP8266.
I really like writing code in VSCode. It’s simple, fast, and insanely customizable. If you haven’t tried it out yet, I highly recommend it. It has become my default editor for everything. It just so happens you can install an Arduino plugin, and have all the features of the original Arduino IDE right inside VSCode.
To get this to work, you do need to have the original Arduino IDE installed. So if you haven’t done that yet, do so now.
Once that is installed, fire up VSCode (or download and install it if you haven’t already) and open the extensions manager. Search for Arduino and install the one labeled Arduino for Visual Studio Code published by Microsoft.

Or you can press ctrl + p to open the command palette and type the following:
ext install vscode-arduino
Once you have it installed, you have to tell it where you installed the original Arduino IDE so it can find all the libraries. You can configure this by pressing ctrl + , to open the settings window. Add the following two lines to the user settings section (make sure you edit the arduino.path to be the path where you installed in on your machine):
"arduino.path": "/home/0xc0ded/Public/arduino/arduino-1.8.5",
"arduino.additionalUrls": "http://arduino.ESP8266.com/stable/package_ESP8266com_index.json"
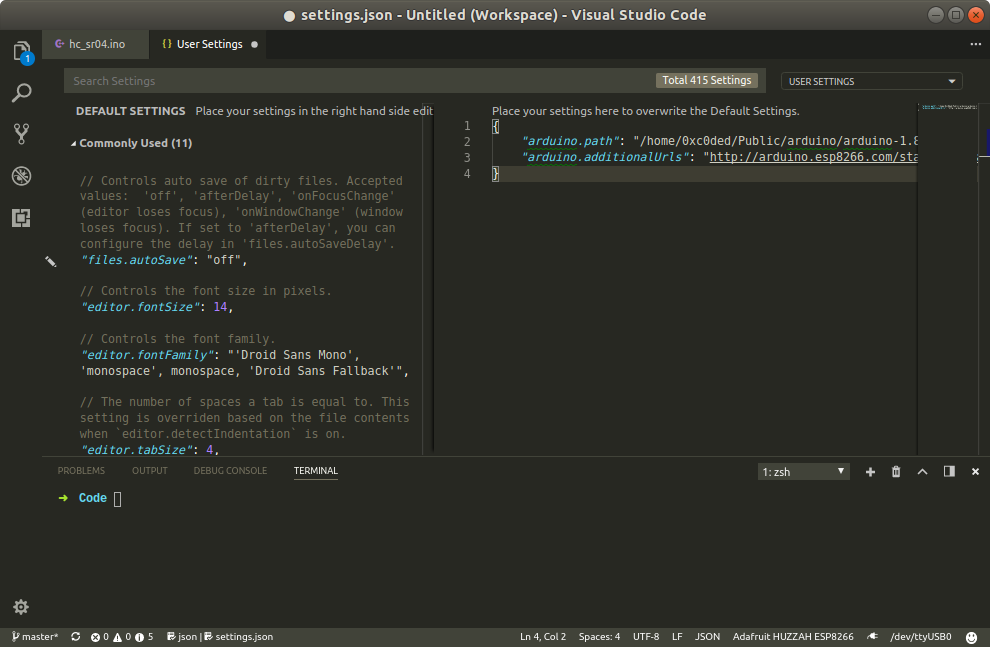
The first line tells VSCode where you installed Arduino IDE, the second is the package url for the ESP8266 community arduino libraries.
Once you have those settings saved, you can now open the library manager and install the ESP8266 libraries. Do so by pressing ctrl + shift + p and start typing library. The option Arduino: Library Manager will probably filter to the top of the list before you get to the b. Press enter, and search for ESP8266. Install the package from the ESP8266 Community.
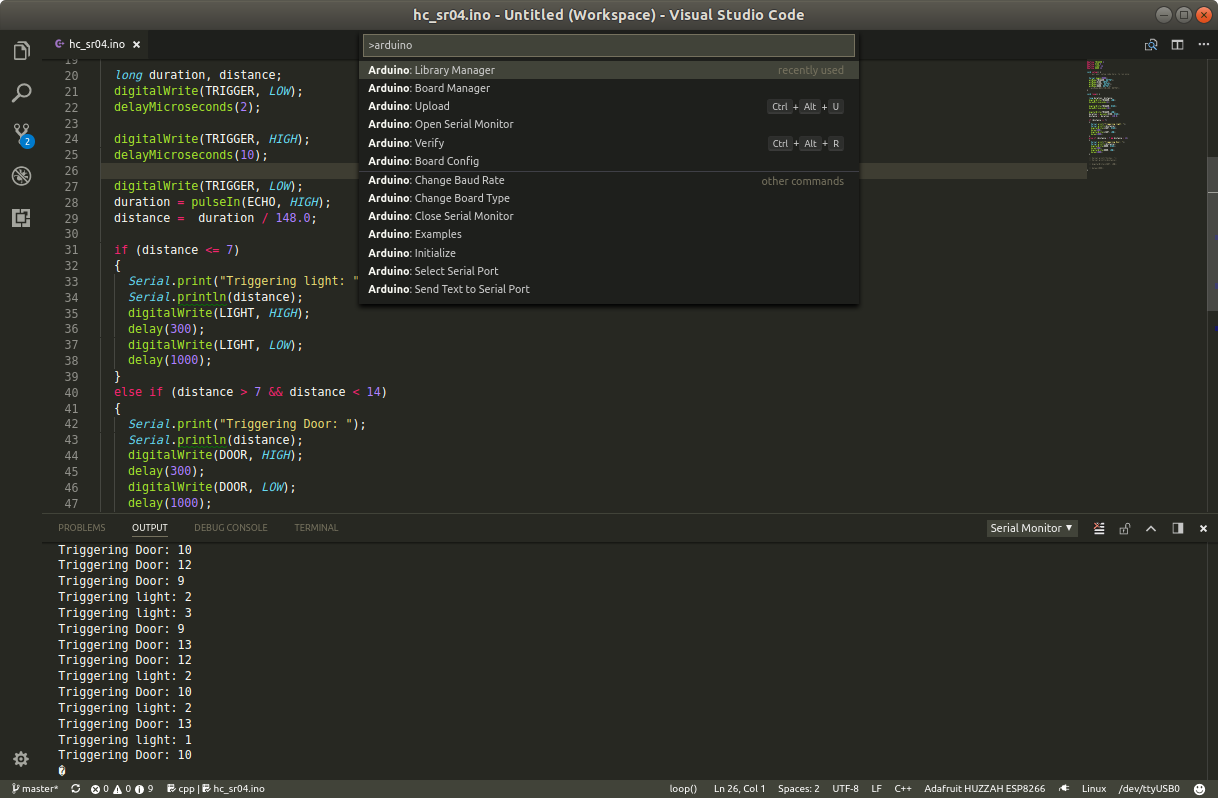
At this point you should be able to do everything you could before in the Arduino IDE from VSCode. Start by pressing ctrl + shift + p and type Arduino. You should see all the arduino tools that are now available to you in the command palette.
Launch the board config to setup the specific ESP8266 you are using. I’m currently using one of the HUZZAH boards from Adafruit.
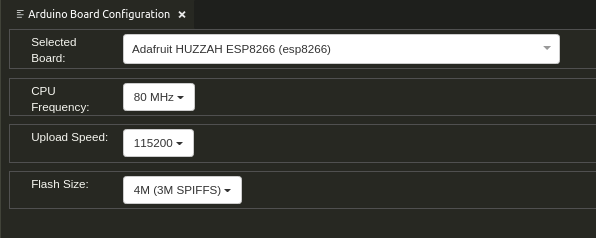
To connect the board to your computer so you can use the serial console and upload images, you’ll need an FTD cable. Uploads seem to work best at 115200 baud.
You can access the board config, serial monitor, and serial port from the status bar also.

After getting this all setup, there was one annoying thing I noticed. For some reason, all the arduino functions had red squiggly lines under them. VSCode said that it couldn’t find any references to those identifiers. After some playing around, and some googling, I found a workaround posted in an issue for the VSCode C++ extension. Just open your VSCode settings (press ctrl + ,) and add the following line:
"C_Cpp.intelliSenseEngine": "Tag Parser"
This tells VSCode to use the older intellisense engine for code parsing. As of now, this seems to work for me. There appear to be other workarounds by adding the arduino library paths to the c\_cpp\_properties.json file. I’m not sure I want to update paths every time a library isn’t found.
I was surprised how full featured the ardunio extension is. I’m excited that I have yet another reason to use VSCode.